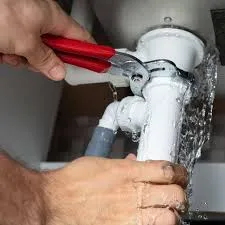
How to Repair a Water Pipe Leak: 7 Steps to Control the Damage
A burst pipe is one thing, but even a slow drip can quickly turn a minor plumbing issue into a serious household problem. If you've noticed a leak and you're wondering what you can do before a plumber arrives, there are a handful of safe and practical options available to New Zealand homeowners.
Keep in mind that major repairs should always be carried out by a licensed professional. But these seven steps can help you control the situation early, limit further damage, and potentially save money while you wait for a permanent fix.
1. Turn Off the Water Supply Immediately
The first thing to do with any leak is stop the flow of water. Locate your property's main water shutoff valve — it's usually found near the front boundary or water meter — and turn it off by rotating it clockwise. This cuts the water supply to the affected pipe and gives you time to assess the situation.
If you're not sure where the valve is, your local water supplier can help you locate it over the phone. Once the water is off, drain the system by opening a tap at the lowest point of your home before attempting any repair.
2. Use Epoxy Putty for Small Pinholes
For a minor drip on an accessible section of pipe, epoxy putty is one of the quickest temporary solutions. Knead the putty into a ball, press it firmly over the leak, and shape it to form a watertight seal. It hardens within minutes and can be used on copper or plastic pipes.
It's worth being realistic about epoxy putty — it's a temporary fix and the pipe will eventually need proper repair or replacement. It may not hold the leak at all in some situations, but it's a safe, affordable first step when you need to buy some time.
3. Try Self-Fusing Silicone Tape
Self-fusing silicone tape is another legal and accessible option for homeowners. The tape sticks to itself rather than the pipe and forms a tight seal when wrapped firmly around the leak. It works best on low-pressure pipes and is particularly useful as a short-term measure while you wait for a plumber.
Wrap the tape tightly with each layer overlapping the last. Like epoxy putty, this should never be treated as a permanent solution — but it's cheap, safe, and can be surprisingly effective in the right situation.
4. Install a Pipe Clamp or Repair Sleeve
For slightly larger leaks, a pipe repair clamp or sleeve offers a more secure temporary fix. These kits are available at most hardware stores and use a rubber gasket held in place by a metal clamp fitted over the damaged section.
Choose a clamp that matches the diameter of your pipe, align the rubber gasket over the leak, and tighten the bolts evenly. This is one of the more reliable short-term fixes, though it still isn't a substitute for replacing the damaged section of pipe.
5. Replace Worn Washers at Leaking Joints
Not all leaks come from the middle of a pipe. If you're seeing water forming around a threaded joint or fitting, the culprit is often a worn rubber washer. Turn off the water, unscrew the joint, and check the washer inside. Replacing it with a new washer of the same size is a straightforward fix that any homeowner can carry out. This is particularly common at PVC fittings or mixed metal-and-plastic connections.
6. Use Plumber's Tape on Threaded Connections
Plumber's tape — also known as Teflon tape — is a simple fix for leaks at threaded fittings. Wrap the tape around the male threads two to four times, then reassemble the joint. This creates a watertight seal and is one of the most common DIY solutions for leaks at threaded connections.
Take care not to overtighten plastic fittings when reassembling, as this can crack the fitting and make the leak worse rather than better.
7. Replace Short Sections with a Slip Coupling
If you're comfortable using basic tools, replacing a damaged section of pipe with a slip coupling is a more permanent DIY option. Turn off the water, cut out the damaged section using a pipe cutter or hacksaw, deburr the edges, and slide in a slip coupling of the matching diameter. This works on both copper and plastic pipe.
It's worth noting that while replacing short sections of pipe in your own home is generally permissible, anything beyond a straightforward join should be handled by a licensed plumber. If you're unsure whether a repair is within the legal DIY scope in New Zealand, it's always safer to call a professional.
When to Call a Plumber
The seven methods above can help in a pinch, but they all have limits — and some won't hold at all depending on the situation. A licensed plumber has access to the tools, materials, and expertise to make repairs that are both safe and lasting.
Equally important is leak detection. Leaks hidden inside walls, under concrete slabs, or above ceilings often cause far more damage than visible ones — and they can go unnoticed for months. A qualified plumber with professional leak detection equipment can locate the source of a hidden leak without unnecessarily opening up walls or flooring.
Getting a hidden leak identified and repaired early can prevent structural damage, mould growth, and much larger repair bills down the track.
Need Help with a Leaking Pipe in Wanaka?
Wanaka Plumbing & Gas provides expert pipe repairs and professional leak detection services throughout Wanaka and the surrounding area. Whether you're dealing with a visible drip, a burst pipe, or a hidden leak you can't locate, our licensed team can find it and fix it properly.
Don't leave a leak to chance. Contact Wanaka Plumbing & Gas today for reliable, permanent repairs — or reach out any time for emergency assistance.